Resistance Bands for Ankle Strengthening: Technique and Progression
A practical guide to using a resistance band for ankle strengthening: which band to pick, how to set it up so the resistance actually reaches your ankle, how many reps and how much discomfort is reasonable, and how to progress over weeks instead of doing the same three sets forever.
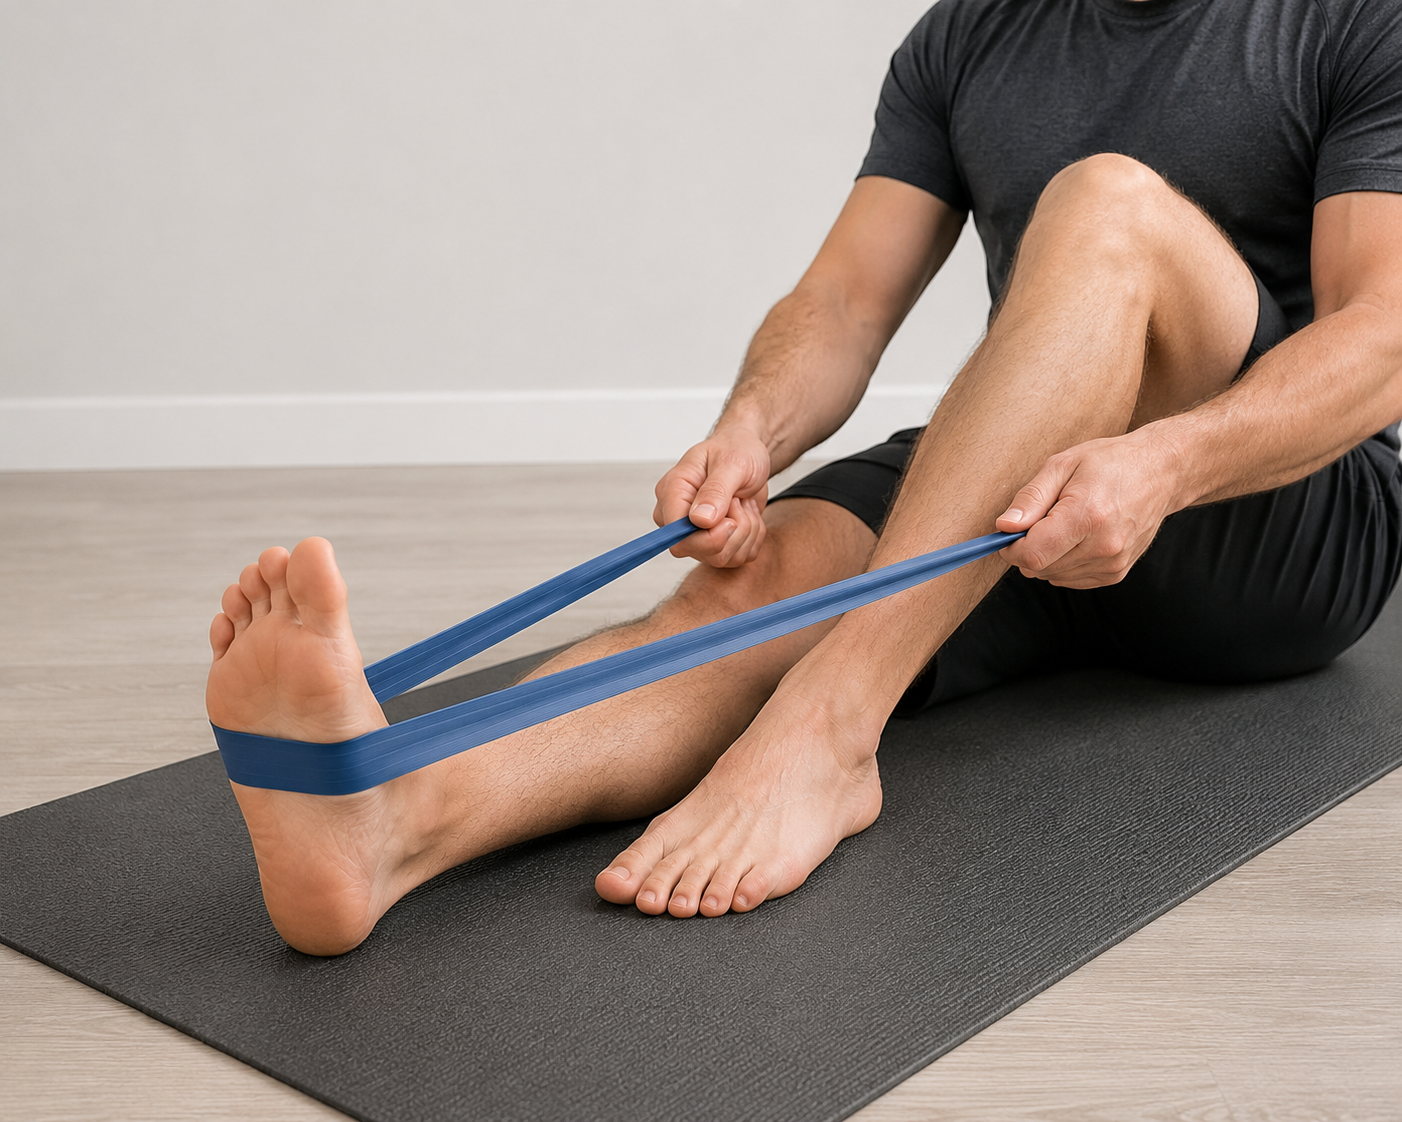
Most people who come in with a resistance band have already been doing something with it. Usually for a while. Usually the same three directions, the same green band, the same fifteen reps, since whenever someone first handed it to them.
And the honest question they ask is some version of: is this doing anything?
Fair question. A band is a tool, and like any tool it depends entirely on how you use it. Done thoughtlessly, band work becomes a warm-up you never graduate from. Done well, it’s one of the most controllable ways to load an ankle that isn’t ready for bodyweight demands yet, and one of the easiest ways to strengthen a specific direction that keeps letting you down.
Let’s talk about how to make it the second thing.
Do ankle resistance bands actually work?
Yes, with a condition attached.
Bands work because muscle and tendon respond to demand. Ask a muscle to produce more force than it’s used to, repeatedly, over weeks, and it adapts. That’s true whether the resistance comes from a dumbbell, your body weight, a machine, or a rubber band. The tissue doesn’t know what’s pulling on it. It only knows how hard it had to work.
The condition is progression. A band that felt challenging in week one is not challenging in week six, because you got stronger. If nothing about the exercise changes, the demand stays flat, your ankle has already adapted to it, and you’ve moved from strengthening to maintaining. That’s the single most common reason band work stalls out. Not the band. The plan around the band.
The other thing worth knowing: early improvement is mostly your nervous system learning to recruit the muscle better and coordinate the movement. That happens within a couple of weeks and it feels great. Real structural change in muscle and tendon takes longer, often in the range of eight to twelve weeks of consistent loading for many people. Which is exactly why stopping when it stops hurting tends to backfire. The pain quieted down. The tissue hasn’t finished changing.
What can a band actually do, and what can’t it?
A band is excellent at a few specific jobs:
- Loading the muscles that turn your foot in and out. These are hard to load any other way. You can’t put a dumbbell on the side of your foot. A band solves that problem elegantly.
- Giving you resistance you can dial in precisely. You control it by band thickness, by how far you stretch it, by where you anchor it. That granularity matters a lot when an ankle is irritable.
- Working in positions where standing is not an option yet. Sitting on the floor with a band around your foot demands almost nothing from the rest of you. Useful early after a sprain, after a period of limited weight bearing, or when standing itself is the painful part.
- Being available. In a suitcase, in a desk drawer, behind the couch. Consistency beats intensity, and the tool you actually reach for beats the better tool you don’t.
What a band is not good at: producing the large forces your ankle deals with in real life. Walking asks your calf and Achilles to handle a substantial multiple of your body weight. Running asks considerably more. No band you can buy at a reasonable price comes close to that. So band work is a stage and a supplement, not the whole plan. At some point calf raises, single leg work, and eventually hopping or running have to enter the picture, because that’s the load your ankle actually has to be capable of. If you want the broader map of what builds real ankle stability, we cover that separately in Best Way to Strengthen Ankles. This article is about doing the band part well.
Which band, honestly
People overthink this. Here’s the short version.
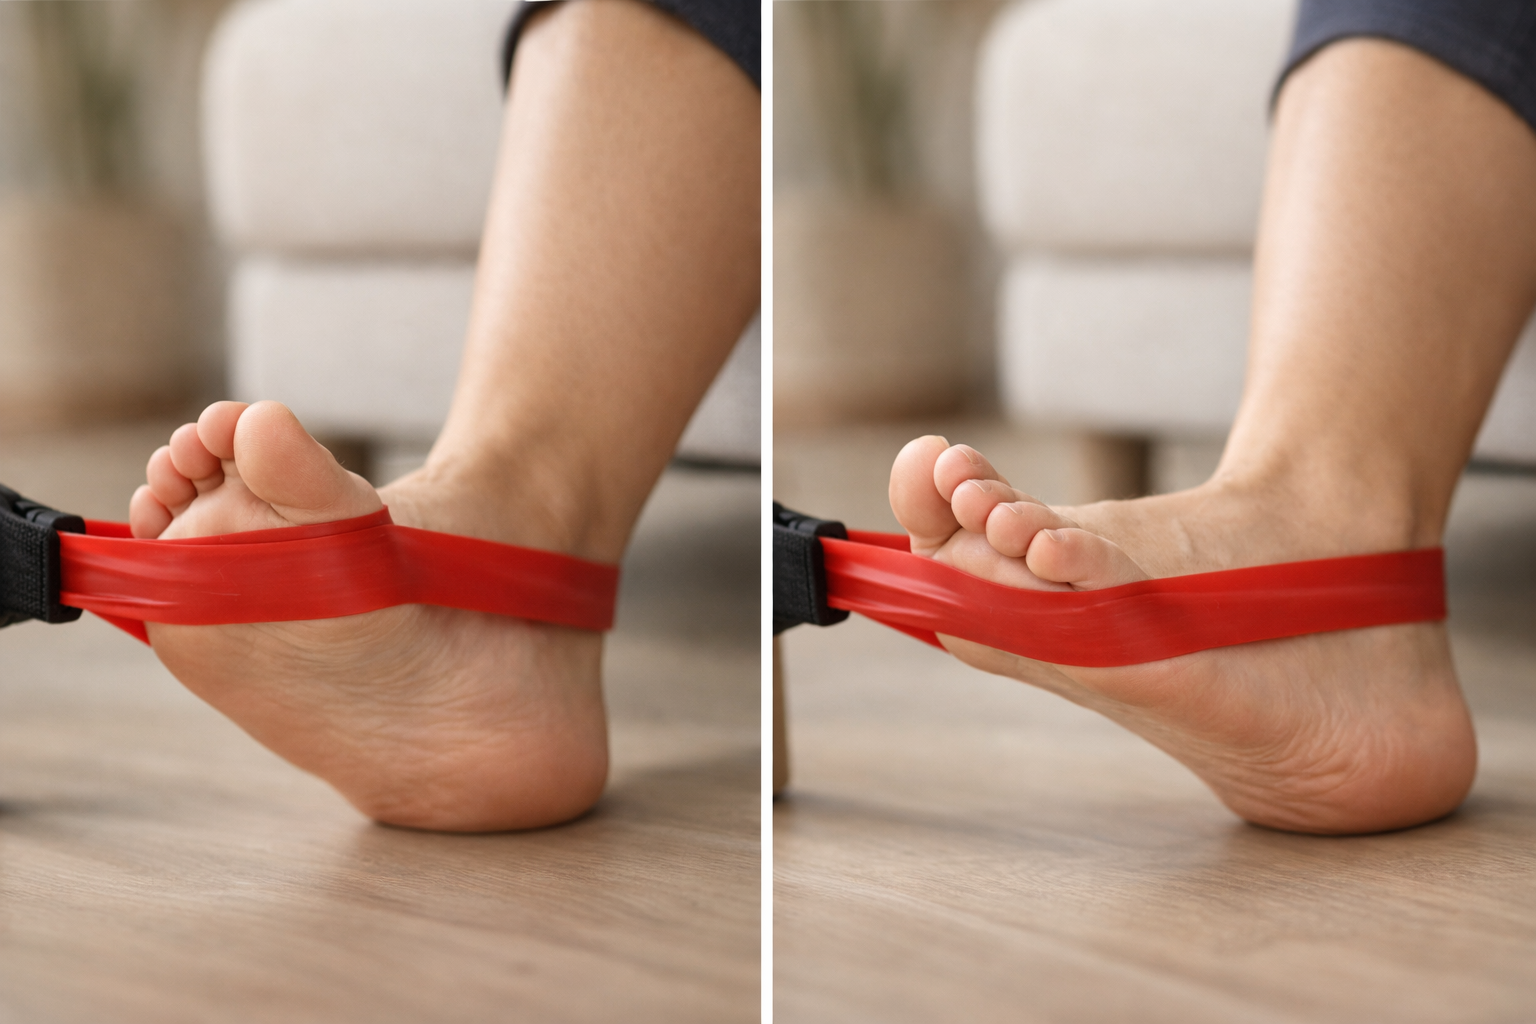
Flat therapy bands (the wide, thin, slightly powdery sheets, sold in rolls or precut lengths) are the most versatile for ankle and foot work. They wrap around the foot without digging in, they distribute pressure across the arch or the ball of the foot, and they come in a graded series of resistances, usually color coded, so you have a clear ladder to climb. If you buy one thing, buy a couple of lengths of flat band in two adjacent resistance levels.
Tubing with handles works well for the in-and-out ankle motions because the handles give you something to hold and anchor. Slightly harder to loop comfortably around a bare foot; a lot of people slide it over the shoe instead, which is fine.
Mini loop bands (the small continuous circles) are good for exercises where you want resistance between the two legs, and they’re convenient for hooking around a table leg. Less useful wrapped directly around a foot, because a narrow loop concentrates pressure on a small patch of skin.
Ankle cuffs and strap attachments are comfortable and let you use heavier resistance without the band cutting into you. Worth it if you’re loading hip and ankle together. Not necessary for foot and ankle basics.
As for the best band for ankles: the best one is the one where you can complete your target reps with good control, and the last two or three reps feel genuinely hard. If you can do thirty and stop because you’re bored, it’s too light. If your form falls apart at rep four or your foot starts cramping, it’s too heavy. That’s the whole selection process. Color is a manufacturer’s convention, not a diagnosis.
One practical note: latex bands degrade. Heat, sunlight, oils, and nicks from a rough floor all shorten their life. A band that snaps mid-rep is startling and can sting. Check for small tears near where you tie or grip, and replace them when they look chalky or thin in spots. Latex-free versions exist if you’re sensitive.
Which is better, ankle weights or resistance bands?
They do different things, and the difference is more interesting than which one wins.
A band gets harder the further you stretch it. So resistance is lowest where the movement begins and highest at the end range, which is where you’re typically weakest and least protected. That can be an advantage (you’re strengthening the end range you actually need) or a nuisance (the hardest part arrives when your control is worst).
An ankle weight provides constant resistance, but only against gravity. Strap one on and try to turn your foot outward while sitting; gravity isn’t opposing that motion at all, so the weight does almost nothing. Ankle weights are useful for hip work and for some straight-leg movements. For the side-to-side ankle motions, a band is clearly the better tool.
For the up-and-down motions, especially pushing your foot down like a gas pedal, neither is the real answer long term. Your body weight is. A calf raise loads that motion far more than any band, which is why the progression eventually moves off the floor and onto your feet.
So: bands early and for the sideways directions, body weight for the pushing-down direction as soon as you can tolerate it, ankle weights as a minor supporting player. If someone asks what device they should get to strengthen their ankles, my answer is usually a set of flat bands, a step or a book to raise your heels off of, and eventually nothing at all except your own body weight on one leg.
Setting it up so the resistance actually reaches your ankle
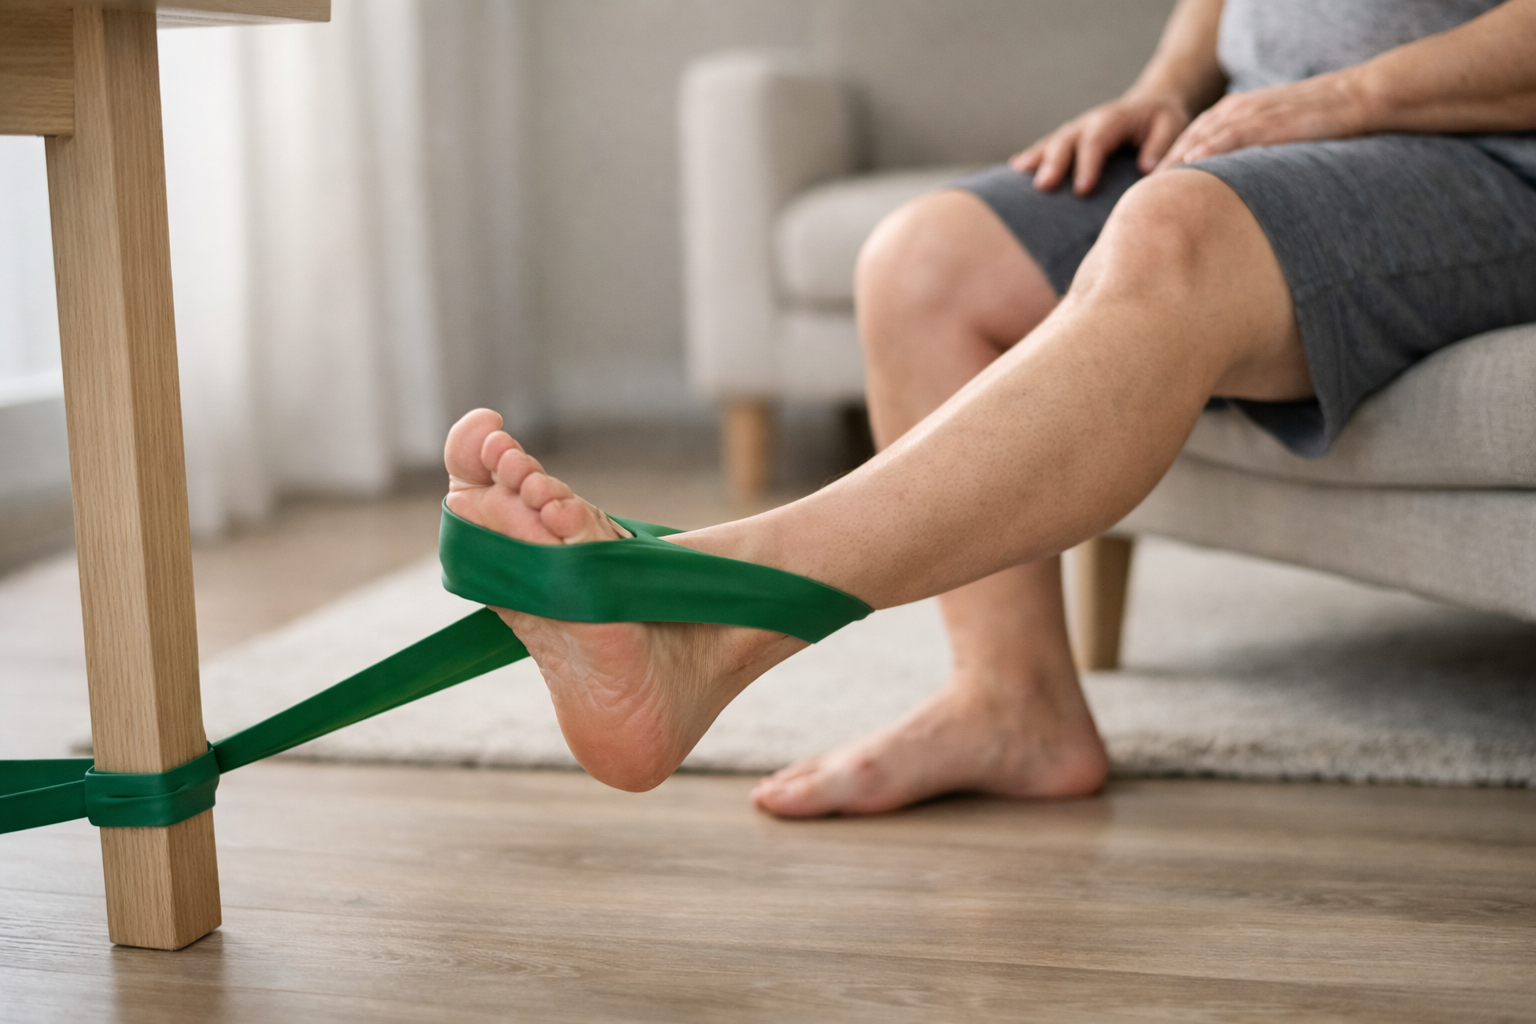
This is where most home band work quietly goes wrong. The exercise looks right. The force is going somewhere else.
Anchor lower than you think. If the band is anchored high, you fight it with your hip and knee. For ankle work you want the anchor roughly at foot height. A table leg, a doorframe with the band knotted around it near the floor, a heavy couch. Sitting on the floor with your leg extended and the band anchored at floor level is close to ideal.
Keep the leg still. The single biggest error: rotating the whole leg from the hip instead of moving the foot at the ankle. It feels like the exercise is working because you feel effort, but the effort is in your hip. Fix it by placing your hands on either side of your thigh, or by pressing the outside of your leg against a wall or the couch, so the leg physically cannot rotate. Then the only thing that can move is your foot.
Where the band sits matters. For turning in and out, the band goes across the ball of the foot, not the toes and not the arch. Too far forward and you’re mostly using your toes. Too far back and the leverage disappears.
Move slowly in both directions. The return is not a rest. Letting the band snap your foot back wastes half the exercise. Roughly two seconds out, hold briefly, three to four seconds back. Controlled lowering is where a lot of the strengthening happens, and it’s the part everyone skips.
Take off the shoe if you can. Working barefoot or in socks lets the foot muscles participate, and you get much better feedback about whether the movement is coming from the ankle.
The exercises, with the details that matter
Four directions cover the ankle. Do all four unless someone has told you otherwise for a specific reason, because the weak direction is rarely the one you’d guess.
Turning the foot outward (against the band pulling inward)
Sit on the floor, leg out straight. Anchor the band to your left at foot level if you’re working the right foot, so the band pulls your foot inward. Loop it across the ball of your foot. Now turn the sole of your foot outward, away from your other leg, keeping your knee and thigh completely still.
This is the direction that matters most after a rolled ankle. The muscles running down the outside of the shin are the ones that resist your ankle folding underneath you, and they’re commonly underdone. If one direction feels notably weaker, it’s often this one.
Range is small. A couple of inches of foot movement is normal. Don’t chase distance by swinging your leg.
Turning the foot inward (against the band pulling outward)
Same setup, anchor on the opposite side, band pulling the foot outward. Turn the sole of the foot inward, toward the other leg.
This one loads the muscles that support your arch, including the one that runs behind the inner ankle bone and helps hold the arch up under load. If you have arch or inner heel symptoms, or your foot flattens noticeably when you stand on one leg, this direction is worth attention. It also tends to be the one people do least, because it’s easier to cheat with the whole leg.
Pulling the foot up toward your shin
Sit with the leg out, anchor the band in front of you at floor level (a table leg works, or loop it around your other foot), band across the top of the ball of your foot. Pull your toes and forefoot up toward your knee.
Useful for the front-of-shin muscles, which matter for clearing your foot when you walk, controlling your foot’s landing so it doesn’t slap down, and for getting up hills and stairs. People who trip on curbs or scuff a toe are often short on this.
Pushing the foot down against the band
Band across the ball of the foot, hold both ends in your hands, push your foot away like flooring a gas pedal.
Good as an early entry point for the calf and Achilles, and reasonable for the plantar fascia and the small muscles under the foot. But be clear-eyed: this is a starting point. The calf complex handles enormous loads when you walk. As soon as you can tolerate it, move this direction toward seated calf raises, then standing double leg calf raises, then single leg, then adding a step for extra range, then adding weight. The band version is the on-ramp, not the destination.
One more worth adding
Toe and forefoot work. Wrap a band around your big toe and pull it upward while you push the toe down against it. It sounds fussy. It’s not. Your big toe does real work at the end of every step, and people with persistent arch and heel symptoms are frequently weak there. Slow, small, controlled.
What is the most effective exercise for strengthening my ankles?
There isn’t one, and I’d be suspicious of anyone who names one.
But if you pushed me: for most ankles, the highest-value loading is calf raise work progressed properly, because it addresses the direction that carries the most real-world load. And among band exercises specifically, the outward turn is the one I most often find undertrained and most often see connected to feeling unstable on uneven ground.
The more useful answer is that the most effective exercise is the one that targets your weak direction, at a resistance that’s genuinely challenging for you right now, done consistently, and made harder as you improve. That’s less satisfying than a single magic movement. It’s also what actually works. An evaluation can tell you which direction is lagging in about five minutes, which saves you months of spreading effort evenly across things you’re already fine at.
Reps, sets, and how hard is too hard
A reasonable starting structure for most people: two to three sets of ten to fifteen repetitions per direction, most days of the week, with slow controlled movement in both directions.
On how it should feel. Some discomfort during strengthening work is normal and not a problem. For many people a useful ceiling is keeping symptoms at or below roughly a 4 out of 10 during the exercise, and expecting that whatever you feel afterward has settled back to your baseline within about a day. If it’s still elevated the next morning, or a day and a half later, that was more than your ankle was ready for. Not a disaster. Just information. Drop the resistance a level or cut a set and try again.
What should make you stop and reassess rather than push through: sharp pain rather than a working ache, pain that increases as you go rather than easing after the first few reps, swelling that appears after sessions, or an ankle that feels less stable afterward than before.
And track more than pain. Pain is a noisy signal. It moves with sleep, stress, how much you walked yesterday, and the weather in ways that have nothing to do with tissue health. So also watch: how many reps you can control at a given resistance, how long you can stand at work before you notice your ankle, how far you can walk, how fast you settle down afterward. Those numbers tend to improve before the pain number does, and they’re telling you something real. Function matters as much as pain.
Progressing, which is the whole point
Here’s the part that separates band work that changes something from band work that fills time. You need a way to make it harder that isn’t just “buy a thicker band.”
In rough order of what to change first:
- Add reps within the same set. Ten becomes twelve becomes fifteen.
- Slow it down. Take four seconds to return instead of two. Same band, more work.
- Add a pause at the end range. Two to three seconds where the band is most stretched and the muscle is working hardest.
- Increase the stretch. Move further from the anchor, or shorten the band. This gives you finer increments than jumping band colors, which is often a bigger step up than it looks.
- Add a set.
- Then move to the next band. And when you do, expect to drop back to the lower end of your rep range. That’s normal, not a setback.
- Change position. Doing the outward turn seated on the floor is easier than doing it in a partial standing position where the ankle also has to hold you up. Adding a balance demand on top of the resistance is a real progression.
- Leave the band behind. Standing calf raises, single leg balance on unstable surfaces, step downs, hopping. For most ankles this is where the plan is headed. The band got you to the point where those are possible.
Stay at each level long enough to adapt before advancing. Roughly one to two weeks at a given level suits many people, though a persistently irritable ankle may need longer, and a healthy ankle rebuilding after a minor sprain may move faster. The response guides what comes next, more than the calendar does.
A note on the trap of moving too slowly: doing the same easy set forever is far more common than progressing too fast. If you’ve been doing the identical routine for two months and it feels the same as it did in week one, the loading has stopped being loading. Your ankle already handled it.
Can weak ankles be strengthened?
Yes. Muscle and tendon are responsive tissue at essentially any age. This isn’t a small effect either; people rebuild meaningful ankle strength after sprains, after long periods of not walking much, after surgery, and after years of avoiding uneven ground.
A few honest caveats.
If your ankle has been unstable for years, you’re probably starting from a lower baseline and the progression needs to be more patient. Longer duration usually means a slower ramp, not that it can’t change.
If what you’re calling weakness is really a mechanical problem inside the joint, band work alone won’t sort it out. A significantly torn ligament, a bone that healed out of position, damage to the joint surface, real loss of motion where the joint physically won’t move: those change what the plan needs to look like. Strength work still usually helps, but it may not be the main event.
And not every ankle or heel symptom is a strength problem. Nerve irritation, a stress reaction in bone, arthritis, and a few other things can mimic what people assume is weakness or tendon pain. If you’ve been diligently loading for six or eight weeks with nothing moving in the right direction, that’s a signal to get it looked at rather than to keep grinding the same routine harder.
Fitting it into the rest of your day
Your ankle doesn’t distinguish between your exercises and everything else you do. It just experiences total load. Twelve thousand steps, six hours on a concrete floor, a new pair of shoes, an airport, then your band work on top.
This matters practically. If a flare-up shows up after a session, look at the whole day before you blame the exercise. Very often the exercise was fine and the day was the problem. Symptoms can also lag a day or two behind whatever caused them, so the Tuesday soreness might belong to Sunday’s hike, not Monday’s band work.
It also means the volume can flex. On a heavy day on your feet, do one set instead of three. On a desk day, do the full thing. That’s not slacking, it’s paying attention. The point is a consistent upward trend over months, and a flare-up somewhere in there doesn’t erase the progress underneath it.
And don’t rest completely because things got sore. Backing off briefly to let irritation settle is reasonable and sometimes necessary. Extended rest is a different story: it lowers what your ankle can handle, so when you return to normal life, the same activities feel worse than they did before. Rest calms the sensitivity without building anything. Rest equals rust.
When it’s worth getting eyes on it
See a clinician if your ankle pain is severe, if you can’t put weight through it, if there’s significant swelling or bruising after an injury, if it’s giving way underneath you, if you have numbness or tingling, or if things are steadily getting worse over weeks rather than better. Persistent symptoms that haven’t budged with sensible loading are also worth a proper look, partly to confirm what you’re dealing with and partly because knowing which direction is actually weak lets you stop guessing.
The band isn’t the missing piece for most people. Knowing how to progress it usually is.